


22.7 kg
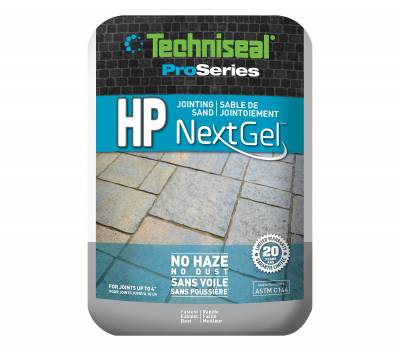
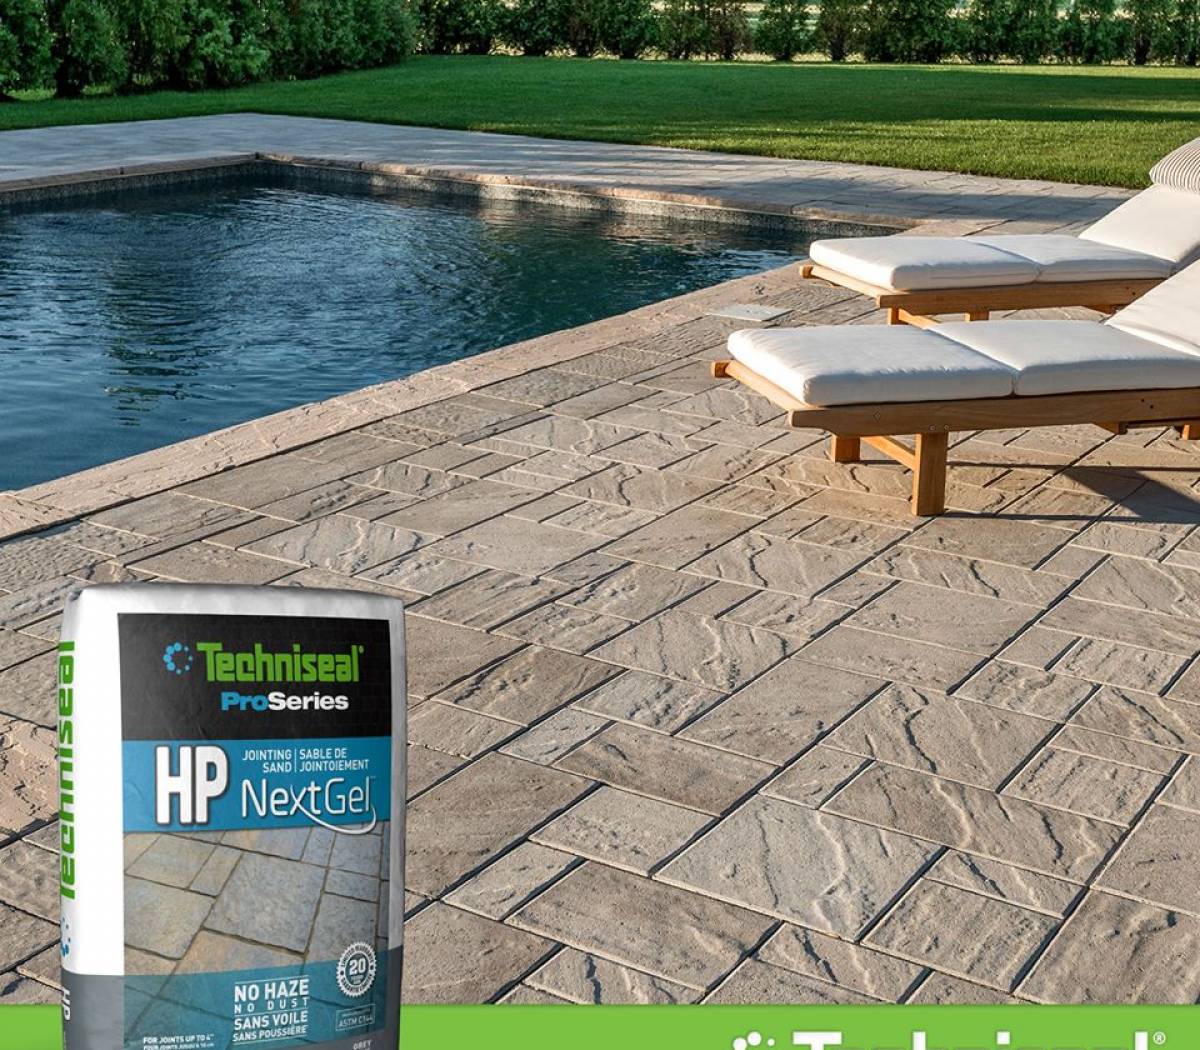
Techniseal® HP NextGel™ Jointing sand is a state-of-the-art mix of graded sand (ASTM-C144) and binder that flows smoothly down joints for a fast and effective installation of pavers or slabs with false, narrow or wide joints. It is also recommended for surfaces exposed to heavy traffic, and for high-humidity areas. Easy to use, NextGel™ Jointing sand starts to set only a few minutes after being activated with water, and quickly becomes resistant to water erosion (rain, splashes, sprinklers, etc.). NextGel™ Jointing sand offers great resistance to weed growth, insect invasion, and erosion. Techniseal® HP NextGel™ Jointing sand has been manufactured with a revolutionary technology called NextGel™. NextGel™ radically transforms and improves the properties and behavior of jointing sand, resulting in the first ever true “no dust †”, “no haze” and “no waste” jointing sand for a fast, clean, durable and profitable installation.
†NextGel™ contains no dust from additives. The dust that can be found is of natural source and comes exclusively from the sand. This is especially true with gray sand which is made from crushed sub-angular aggregates.
Minimum joint width : 1/16”
Maximum joint width : 4”
Minimum joint depth : 1.5” *
* For installation on porcelain tiles that are less than 1.5” thick, fill up joints completely.
Coverage :
For a 22.7 kg bag :
Narrow joints : 60 to 120 square feet.
Wide joints : 25 to 40 square feet.
For a more precise evaluation of the coverage, please refer to the product calculator at techniseal.com.
Storage and shelf life :
Unused bags can be stored outside if they are still on a pallet and protected by the original packaging.
Packaging :
Size : 22.7 kg bag
56 bags per pallet
Before you begin
Before proceeding with the installation, make sure you have an up-to-date technical data sheet in hand. Although HP NextGel can resist an unforeseen rain 60 minutes after its installation, it is recommended to plan for 24 hours without rain in order to obtain optimal performances. For joints wider than 1/2” (natural stone), 48 hours without rain is recommended.
Installation Conditions :
• Bedding must be made of 3/16” dense graded sand. Install over a drainage base and bed (sand-set) as per ICPI recommendations.
• Temperature must be above 0°C for 48 hours following installation.
• Surface and joints must be dry.
• Sprinkler system must be turned off.
• Product must be tested on a small area to insure that texture and colour meet expectations.
Necessary tools :
• Street broom with semi-rigid bristles.
• Plate compactor (pavers and slabs) / Roller compactor (natural stone and porcelain tiles). Plate compactor – Ideally, the plate compactor should have a minimum centrifugal force of 25 kN (5000 psf) and a frequency between 80 and 100 Hz. The weight of the plate compactor should not exceed 100 kg (220 lbs.). A smaller machine can be used for repair work and joint replacement.
• Rubber mallet (large slabs)
• Leaf blower.
• Spray nozzle and garden hose.
Compaction Information :
For pavers and slabs, use a plate compactor as described above. For natural stone, use a roller compactor or a plate compactor on a membrane such as a flat-joint plastic snow fence or a 5/8” thick plywood sheet. For slabs with a sensitive surface, use a plate compactor with a membrane such as a flat-joint plastic snow fence placed on top of the paved surface. For large slabs, porcelain tiles and where a plate compactor cannot be used, proceed with a manual compaction : hammer vigorously each corner as well as the contour of each slab with a rubber mallet. This will generate a vibration and pack down the product. To ensure a proper compaction, we also recommend cutting through the joints with a joint trowel while taking care not to mix the polymeric sand with the bedding sand.
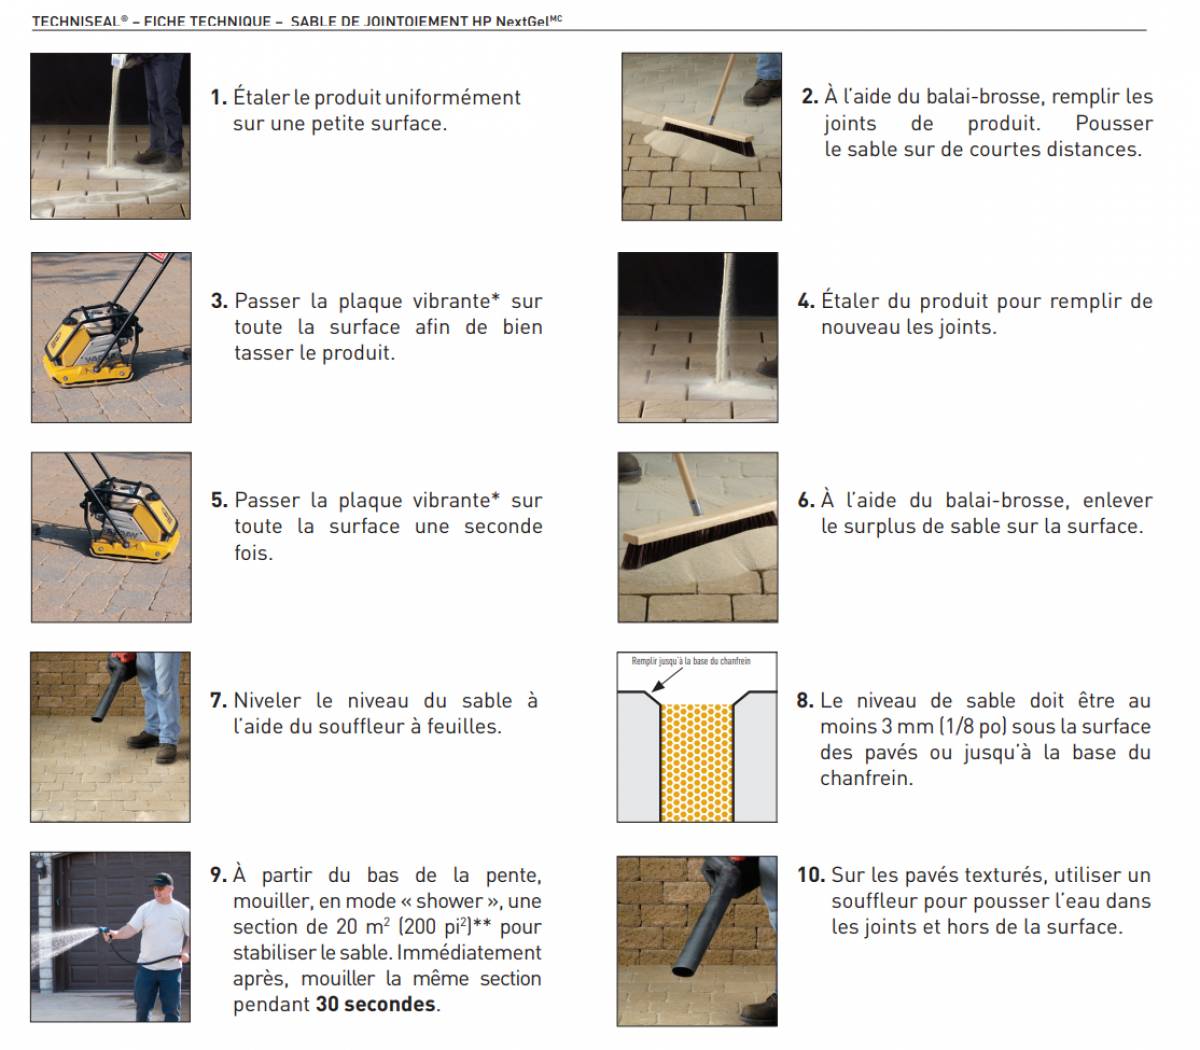
Application :
1. Spread product evenly on a small surface.
2. Using the street broom, fill joints completely. Sweep sand over short distances.
3. Pass the plate compactor* over the entire surface to compact the sand.
4. Spread more product to fill joints again.
5. Pass the plate compactor* over the entire surface a second time.
6. Remove excess sand from the surface with the broom.
7. Level the height of the sand with the leaf blower.
8. Sand level must be at least 1/8” below top of pavers or up to the bottom of the chamfer.
9. Starting from bottom of the slope, quickly shower a 200 square feet section** to set the sand (10 to 15 seconds). Immediately afterwards, wet the same section for 30 seconds.
10. On textured pavers, use the blower to blow the excess water off the surface and into the joints.
*For natural stone and porcelain tiles, replace the plate compactor with a Roller compactor.
** When wetting joints wider than 1/2” : wet sections no larger than 50 square feet. For each section, shower for 30 seconds a first time, then shower again for another 30 seconds or until joints can no longer absorb water.
Drying :
To ensure optimal cohesion and long-term stability, HP NextGel Jointing sand must dry completely after initial wetting. Drying time will be shorter if it is warm and dry, and longer if the climate is cool and damp or if product is used with natural stone.
Traffic : Pedestrian: Immediate / Vehicular: 48 to 72 h. Block access during that period.
Caution :
• Wear appropriate safety gears.
• Do not use this product as capping sand.
• Do not mix product with cement, sand or any other material.
• Wait 30 days after installation before cleaning and sealing pavers.
• Not for use on submerged or constantly wet surfaces.
• Joints become soft when humid but become hard again when dry.
• Because product comes from a natural source, colour and grain size may vary.
• This product starts repelling water only a few minutes after initial wetting - wet no more than 200 square feet of surface at a time.
• Do not sweep product over asphalt.